
Langkah Langkah Menginstall WordPress di CentOS
1. Buka Terminal di CentOS
2. Login ke root dengan perintah su dan masukkan Password root
]$ su3. Update yum
]# yum update4. Install php versi 7.4
]# yum install epel-release yum-utils -y]# yum install http://rpms.remirepo.net/enterprise/remi-release-7.rpm -y]# yum-config-manager --enable remi-php74]# yum install php php-common php-opcache php-mcrypt php-cli php-gd php-curl php-mysql -y5. Cek Versi php untuk memastikan
]# php -v6. Install MariaDB
]# yum install mariadb-server -y]# systemctl enable mariadb.service]# systemctl start mariadb.service7. Masuk kedalam MariaDB
]# mysql -u root8. Buat database wordpress
MariaDB> CREATE DATABASE wordpress;9. Buat User WordPress
MariaDB> CREATE USER wordpressuser@localhost IDENTIFIED BY 'password';MariaDB> GRANT ALL PRIVILEGES ON wordpress.* TO wordpressuser@localhost IDENTIFIED BY 'password';MariaDB> FLUSH PRIVILEGES;10. Keluar dari MariaDB
MariaDB> exit;11. Install Apache
]# yum install php-gd]# service httpd restart12. Masuk ke directory ~
]# cd13. Install WordPress
]# wget http://wordpress.org/latest.tar.gz14. Extract hasil download WordPress
]# tar xzvf latest.tar.gz15. Rsync
]# rsync -avP ~/wordpress/ /var/www/html/]# mkdir /var/www/html/wp-content/uploads]# chown -R apache:apache /var/www/html/*]# cd /var/www/html]# cp wp-config-sample.php wp-config.php]# nano wp-config.php16. Ubah yang terdapat garis merah

// ** MySQL settings - You can get this info from your web host ** //
/** The name of the database for WordPress */
define('DB_NAME', 'wordpress');

/** MySQL database username */
define('DB_USER', 'wordpressuser');

/** MySQL database password */
define('DB_PASSWORD', 'password');
Setelah diubah tekan CTRL+X lalu tekan Y dan tekan ENTER
16. Cek IP Address
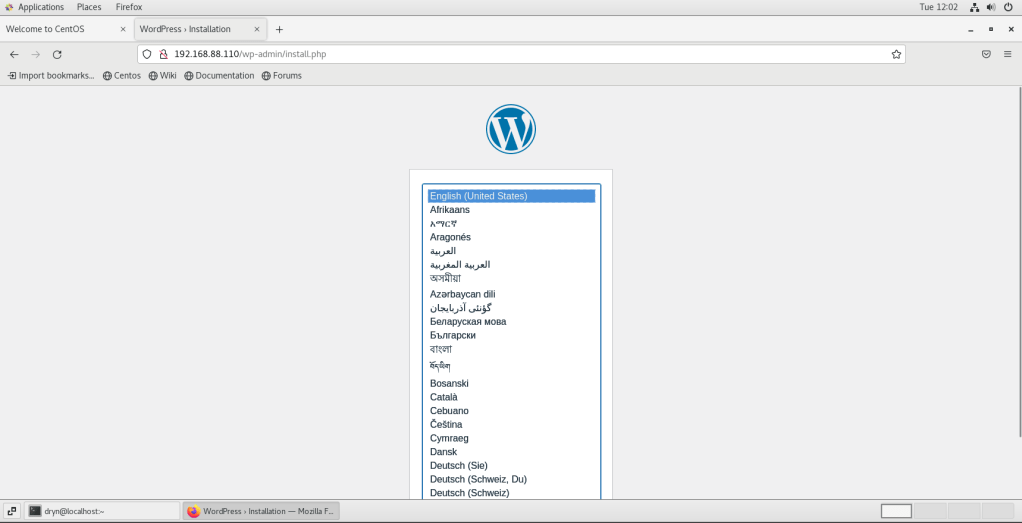
]# ip a17. Ketik pada Browser CentOS http://ip address anda
Sekian dari saya, semoga apa yang saya bagikan dapat bermanfaat bagi kita semua. Jika terdapat kesalahan dalam penulisan article ini saya mohon maaf.
